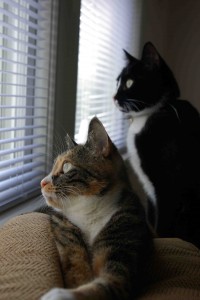
So I recently moved in with my girlfriend, and she has two cute, but rather destructive cats.
 Lately I’ve been getting into electronics and the arduino in particular, but Rosie and CC love to get on my desk when I’m not around and eat my electronics.
What better solution than something using my arduino?
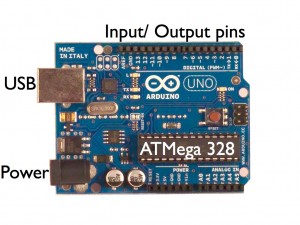
So what is an arduino you might ask? If you haven’t gotten on the boat yet, the arduino is an open sourced microprocessor platform that was created a few years ago in Italy, and since has taken over the electronics hobbyist and designer community. I bought a parallax microcontroller ( Basic Stamp 2 ). The basic stamp is a good platform, with lots of community support and documentation, but the arduino wins on price and being made open sourced. A basic stamp controller with board will set you back about $100, while an arduino is around $25, and if you are brave enough to solder your own (not so much trouble), you can build an arduino for around $15.

The basic idea was to make an infrared beam around three sides of my desk and if someone broke the beam, my computer speakers would yell out something rough enough to scare the cats.
For sound, I bought an MP3 shield from ladyada (here), and read up on the libraries. The cool thing about an MP3 shield is that it comes with SD card support which opens up a lot of data recording possibilities.
I also obtained a few IR LEDs and Receivers, and after playing a LONG while with them, got an interrupt going to trigger the mp3 player. The LONG bit was figuring out how to switch an IR LED on and off at high enough frequency to trigger an IR receiver, which ended up around 38 kHz (see here. The code is pieced together parts of example MP3 code and some IR stuff. Like I said, the 38kHz is the difficult part. You’ll see two variables: waitusup and waitusdown. I used these to manually tune a PWM ir beam basically until the IR receiver picked up on it. This will change depending on the distance, ambient light (light type even – halogens have a good bit of IR). So if you run with below code, start debugging there. This code pulls one file, my girlfriend yelling the cats’ names. I later put in 8 files of her yelling and had the code ‘randomly’ pull one of the files. Sadly, this project was about a year ago and I’ve long since recycled the parts, so I don’t have a video, but see below for the code.
// IR part from IR Oscilloscope
// Audio part from http://www.ladyada.net/media/wavshield/wavehc_play6.pde


#include < FatReader.h >
#include < SdReader.h >
#include < avr/pgmspace.h >
#include "WaveUtil.h"
#include "WaveHC.h"


SdReader card;    // This object holds the information for the card
FatVolume vol;    // This holds the information for the partition on the card
FatReader root;   // This holds the information for the filesystem on the card
FatReader f;      // This holds the information for the file we're playing

WaveHC wave;      // This is the only wave (audio) object, since we will only play one at a time

#define DEBOUNCE 100  // button debouncer

// this handy function will return the number of bytes currently free in RAM, great for debugging!
int freeRam(void)
{
  extern int  __bss_end;
  extern int  *__brkval;
  int free_memory;
  if((int)__brkval == 0) {
    free_memory = ((int)&free_memory) - ((int)&__bss_end);
  }
  else {
    free_memory = ((int)&free_memory) - ((int)__brkval);
  }
  return free_memory;
}

void sdErrorCheck(void)
{
  if (!card.errorCode()) return;
  putstring("\n\rSD I/O error: ");
  Serial.print(card.errorCode(), HEX);
  putstring(", ");
  Serial.println(card.errorData(), HEX);
  while(1);
}

#include < IRremote.h >

IRsend irsend;

int irled = 7;
int sensorValue = 0;
int irin = 6;
int waitusup = 11;
int waitusdown = 6;

void setup() {
  Serial.begin(9600);
  pinMode(irled, OUTPUT);
  pinMode(irin, INPUT);
  pinMode(speakerPin, OUTPUT);
  digitalWrite(irin, LOW);


  // set up serial port
  Serial.begin(9600);
  putstring_nl("WaveHC with 6 buttons");

   putstring("Free RAM: ");       // This can help with debugging, running out of RAM is bad
  Serial.println(freeRam());      // if this is under 150 bytes it may spell trouble!

  // Set the output pins for the DAC control. This pins are defined in the library
  pinMode(2, OUTPUT);
  pinMode(3, OUTPUT);
  pinMode(4, OUTPUT);
  pinMode(5, OUTPUT);

  // pin13 LED
  pinMode(13, OUTPUT);

  // enable pull-up resistors on switch pins (analog inputs)
  digitalWrite(14, HIGH);
  digitalWrite(15, HIGH);
  digitalWrite(16, HIGH);
  digitalWrite(17, HIGH);
  digitalWrite(18, HIGH);
  digitalWrite(19, HIGH);

  //  if (!card.init(true)) { //play with 4 MHz spi if 8MHz isn't working for you
  if (!card.init()) {         //play with 8 MHz spi (default faster!)
    putstring_nl("Card init. failed!");  // Something went wrong, lets print out why
    sdErrorCheck();
    while(1);                            // then 'halt' - do nothing!
  }

  // enable optimize read - some cards may timeout. Disable if you're having problems
  card.partialBlockRead(true);

// Now we will look for a FAT partition!
  uint8_t part;
  for (part = 0; part < 5; part++) {     // we have up to 5 slots to look in
    if (vol.init(card, part))
      break;                             // we found one, lets bail
  }
  if (part == 5) {                       // if we ended up not finding one  :(
    putstring_nl("No valid FAT partition!");
    sdErrorCheck();      // Something went wrong, lets print out why
    while(1);                            // then 'halt' - do nothing!
  }

  // Lets tell the user about what we found
  putstring("Using partition ");
  Serial.print(part, DEC);
  putstring(", type is FAT");
  Serial.println(vol.fatType(),DEC);     // FAT16 or FAT32?

  // Try to open the root directory
  if (!root.openRoot(vol)) {
    putstring_nl("Can't open root dir!"); // Something went wrong,
    while(1);                             // then 'halt' - do nothing!
  }

  // Whew! We got past the tough parts.
  putstring_nl("Ready!");
}


void loop() {

  //Send a signal
  irsignal();

 //Test if it was received..
  sensorValue = digitalRead(irin);
  if (sensorValue == 0) {Serial.println("boring");}
  else{
  playcomplete("1.WAV");
  Serial.println("GET DOWN!!!");
  //song();
  }
  delay(100);
}


void irsignal()
{

    // high and low sums to 26us, which is 1/38kHz
    for (int i = 0; i <= 5000; i++){
      digitalWrite(irled, HIGH);  // ~3us
      delayMicroseconds(waitusup);  // waitus = 10
      digitalWrite(irled, LOW);   // ~ 3us
      delayMicroseconds(waitusdown);  // waitus = 10
    }}


byte check_switches()
{
  static byte previous[6];
  static long time[6];
  byte reading;
  byte pressed;
  byte index;
  pressed = 0;

  for (byte index = 0; index < 6; ++index) {
    reading = digitalRead(14 + index);
    if (reading == LOW && previous[index] == HIGH && millis() - time[index] > DEBOUNCE)
    {
      // switch pressed
      time[index] = millis();
      pressed = index + 1;
      break;
    }
    previous[index] = reading;
  }
  // return switch number (1 - 6)
  return (pressed);
}


// Plays a full file from beginning to end with no pause.
void playcomplete(char *name) {
  // call our helper to find and play this name
  playfile(name);
  while (wave.isplaying) {
  // do nothing while its playing
  }
  // now its done playing
}

void playfile(char *name) {
  // see if the wave object is currently doing something
  if (wave.isplaying) {// already playing something, so stop it!
    wave.stop(); // stop it
  }
  // look in the root directory and open the file
  if (!f.open(root, name)) {
    putstring("Couldn't open file "); Serial.print(name); return;
  }
  // OK read the file and turn it into a wave object
  if (!wave.create(f)) {
    putstring_nl("Not a valid WAV"); return;
  }

  // ok time to play! start playback
  wave.play();
}  </pre>
that is all